HP 4/12 Brocade Firmware Upgrade

If you are like me and got your hands on a Brocade fiber switch from HP, then most likely you will need to do some firmware upgrades.

With these switches you cannot simply go and upgrade to the latest version. HP states that you should not upgrade directly if it is more than 2 versions newer than your current firmware version. So this tutorial will give you the instructions on how to get the older firmware versions as well as how to upgrade them.

Dowloading the firmware

The first thing you need to do is go to http://www.hp.com/ and click on Support & Drivers.

Then you type in your brocade fiber switch model:


hp_download1

On the next page choose “Cross Operating System…” and scroll down till you find the firmware section:

hp_download2


You should see something in the description that starts with “Interim B-Series Firmware…”. Click Obtain Software. Next you must download each file that is newer than your current firmware version:

hp_download3


Once you download all of the ZIP files simply extract them into the same folder. Here is how I structured my folder:

FolderStructure


This folder needs to be accessible by FTP or SCP.

Note: If you are running 5.0.5 like I was, then SCP is not an option. This was added in future versions.


Check your firmware version

The first thing you want to do is run the command firmwareshow after you login.

firmwareshow

This will display your current firmware on your Primary and Secondary versions. One you know the firmware you are currently running you need to find the next version (which you downloaded previously) and start the firmware upgrade.


Upgrade your firmware

To upgrade your firmware you will simply run firmwaredownload to start the process. It will ask you for your server name, username, path, and password.

Your folder structure should be laid out like: ROOTDIR/v6.0.1a and not like ROOTDIR/v6.0.1a/v6.0.1a for the commands I provide to work. If it is like the latter then just adjust the path.

  • firmwaredownload
  • User Name: <your username to FTP>
  • File Name: <new version>/release.plist
  • Network Protocol: Auto, FTP, SCP
  • Password: <your password to FTP>
  • Type: Y to continue

firmwaredownload

Now you should start seeing it process:

firmwareprocessing

It should tell you to reboot afterwards. Login when it comes back up. You need to run firmwareshow again to make sure the primary and secondary versions are both at the new version you just upgraded to.

Note: If secondary says “Unavailable” then that most likely means it is currently updating the secondary version. You will not be allowed to continue with further updates until this is done.

firmwarerebooting

firmwareshow_after


Posted in Firmware Upgrades

CloudPanel – FAQ

When I try to enable a user for Exchange I cannot select anything for the domain.

  • Chances are you didn’t enable an Accepted Domain for that company. Before you can enable users for Exchange you must enable one of their domains as an Accepted Domain. An Accepted Domain is how Exchange knows what domains to receive email for.

How do I reset a users password?

  • To reset a users password you simply click on the user and enter in new passwords in the password fields and click save. If you don’t enter anything in the password fields when editing a user it will not attempt to reset the password.

How can I delete a domain from a company?

  • Currently this is unsupported. You will not be able to do this.

How can I change the Organization Plan assigned to a company?

  • Currently this is unsupported but will be available in the next version. (Should be available by May 2013).

The notifications are not working.

  • You can setup notifications and enable them but they will not send email. At this time it does not work.

How do I setup a forward for a user?

  • Click Mailboxes under the Exchange section and select your user. You will notice a “Forwarding” section. This list will be populated with all contacts, mailboxes, and distribution lists from your domain. To setup a forward for an external user you must first create a contact for that user.

When I delete a company it doesn’t remove the Exchange information from the Exchange Server

  • Currently I am aware of this issue and will fix it as soon as possible. For now you will have to manually remove the Exchange objects for that company (Address Lists, GAL, OAB, Address Book Policy)
Posted in CloudPanel

CloudPanel – Quickstart Guide after Install

After you have installed CloudPanel and configured Active Directory & Exchange there are some things that need to be setup. This tutorial will hopefully get you on your way to managing your multi-tenant environment.

Login

login

The default value for the SuperAdmins is the Domain Admins group in Active Directory. You can setup other groups that have super admins rights but assuming you didn’t simply go to the login page and login as any Domain Admin.

When logging in it will contact Active Directory to authenticate the user credentials that you typed in and redirect you to the dashboard page.

If this is your very first time logging in and you haven’t configured CloudPanel it should redirect you to the settings.aspx page to setup. Once you setup you will not be able to access the settings.aspx page unless you first login.

Dashboard

dashboard

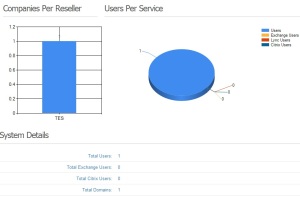
When you reach the dashboard page you should see two charts and some details about your environment below.

The charts will most likely not render your first time logging in because you will not have any resellers, companies, or users setup in the system.

When you get to this point click on the Resellers button at the top.

Resellers

resellers

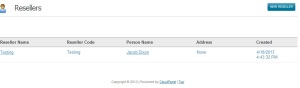
The resellers page is a list of resellers setup in your system. The first thing you must do is click on the New Reseller button in order to create your first reseller.

Please be aware that currently the system does not do much error checking. So please be sure to fill out all the fields and enter in correct information. This will be fixed in future releases.

Once you create your reseller you should be redirected back to the resellers page. Click the link for the reseller and it will bring you to the Companies page for that reseller.

Reseller Plans

plans

The reseller plans is where you setup your environment. These will be applied to your Customers when you create them. Once you create your reseller and click on the Reseller link it will bring you to the Companies page. Here you will notice the “Plans” button a the top right

Organization Plans

Organization plans allow you to limit the maximum amount of users, domains, exchange mailboxes, etc for each company. When you apply this to a company and they reach the limit you specify in the Organization Plan it will not allow them to continue the action they are performing. This will help in making sure Company Administrators can’t just go in and create 5,000 users without you knowing. You may also want to use this to offer different level pricing to your customers.

Mailbox Plans

Mailbox plans allow you to setup certain information that will be applied to users such as mailbox size, the maximum they can send/receive, and many other options. When your plan is applied to a user it will set these values on the Exchange server.

You also have the ability to create a mailbox plan for a specific customer in the event they need some custom settings. Doing this will make it where all the other companies in your environment not be able to see this plan when enabling users for Exchange.

Lync Plans

This is currently not used.

Website Plans

This is currently no used.

Citrix Plans

Citrix plans allow you to create and manage the security groups that are used for your Citrix XenApp (or XenDesktop) environment. This section is only manageable by Super Admins and will not be allowed for Reseller accounts or Company administrators.

When you create a Citrix Plan here it will automatically create the security group and place it in the Applications OU located in your BASE OU (unless you choose not to create the groups automatically). You also have the ability to assign it to a specific company so others will not be able to see it.

When you create a Citrix Plan this will allow your Super Admins, Resellers, or Company Administrators the ability to assign users to these Virtual Applications and/or Servers. Keep in mind you still have to add this security group in Citrix AppCenter or they still will not be able to see the application when they login.

Before you start creating companies you need to setup your Organization Plans so they can be assigned to the company when you create them.

Creating Companiescompanies

After you create a reseller and click the link you will notice a “New Company” button at the top right.

This will bring you to a page where you can enter in information about the company. The company code for the company will be generated based on the name of the company. If the name of the company is only one word it will attempt to take the first three characters of the word and use that. If the company name contains multiple words it will attempt to take the first letter of each word.

In the event that it detects a company code already exists it will then loop through and append a number at the end until it reaches a company code that does not exist

company

Once you create your first company you will need to click on the link and set an organization plan you created early. After you are done then you are setup and ready to go! Start creating users, enabling the company for exchange, or enable the company for Citrix.

Posted in CloudPanel

CloudPanel – Exchange Requirements

Exchange 2010 Address Book Policies address some of the segregation needs in a multi-tenant Exchange environment, but not all. One of the major problems in my opinion is the fact that you can still see every distribution group in Exchange when you look in ECP. Some say to disable ECP for the users but honestly there are settings that a user may need changed that are only located in ECP (such as changing your time zone).

Hide Distribution Group Option and Message Tracking

The first thing we are going to do is remove the distribution group link from ECP as well as message tracking options so users will not even be able to access these features. Follow the steps below closely or CloudPanel will fail since it assigns this policy to each mailbox that is enable:

  • Open the Exchange Management Shell
  • Run: New-RoleAssignmentPolicy “Alternate Assignment Policy”
  • Run: New-ManagementRoleAssignment -Name “MyContactInformation-Alternate Assignment Policy” -policy “Alternate Assignment Policy” -role MyContactInformation
  • Run: New-ManagementRole “MyBaseOptionsWithoutMessageTracking” -Parent MyBaseOptions
  • Run: Remove-ManagementRoleEntry “MyBaseOptionsWithoutMessageTracking\Search-MessageTrackingReport”
  • Run: New-ManagementRoleAssignment -Name “MyBaseOptionsWithoutMessageTracking-Alternate Assignment Policy” -policy “Alternate Assignment Policy” -role MyBaseOptionsWithoutMessageTracking

You will notice that since you ran these commands each and every user that is enabled in Exchange through CloudPanel will no longer have the message tracking options and no longer be able to see the distribution groups link in ECP. You of course still have the option to disable ECP through the Mailbox policies.

Source: http://blogs.technet.com/b/exchange/archive/2010/03/04/3409445.aspx

Configure Send Connector

You should use a third party smart host to relay your email messages. At this time CloudPanel does not have a transport agent that stops inner communication between companies. Chances are this may not be a problem for you but what it could cause is different organizations in your company being sent Internal OOF messages instead of the External OOF messages. A transport agent would delete this message before arriving at the other organization.

Mailtips

Mailtips have the capability of leaking information between companies. The problem is if you completely disable Mailtips then it will show on everyones Outlook client that Mailtips are disabled or inaccessible. BELIEVE ME you will get tons of calls about this from people thinking something is wrong with the server. The solution right now is to set the threshold extremely high so it will never trigger and it won’t do anything.

  • Open the Exchange Management Shell
  • Run: Set-OrganizationConfig -MailTipsExternalRecipientsTipsEnabled $False -MailTipsLargeAudienceThreshold 1000 -MailTipsMailboxSourcedTipsEnabled $False -MailTipsGroupMetricsEnabled $False -MailTipsAllTipsEnabled $True

The above command will enable Mailtips but it will not do anything unless you are emailing a group that has 1000 members or more. You can of course increase this threshold if you have groups larger than that.

Posted in CloudPanel

CloudPanel – Active Directory Requirements

To try to make your environment as secure as possible there may be some things we need to do before CloudPanel will start working probably. Please follow the steps below:

  • Browse to your Base OU (Example: OU=Hosting,DC=cloud,DC=local)
  • Create a security group called “GPOAccess@Hosting” in the base OU
  • Make the following security changes on the GPOAccess@Hosting group:
    • Allow Read All Properties (This Object Only)
    • Allow List Object (This Object Only)
    • Deny List Contents (This Object Only)
  • Create a security group called “AllTSUsers@Hosting” in the base OU

You may also want to go in and remove the Authenticated Users from having READ access from your Base OU. CloudPanel should take care of this for the Reseller OU and all the companies OU automatically.

Currently CloudPanel will not manage your group policy objects for you. This is currently in the works but for now you must manually great GPO for each customer and link them to the OU. Reason you may want to do this is to provide redirected folders for your terminal server users, hide all drives except network drives, and lock down other features such as using the command prompt, registry editing tools, and many other things

Posted in CloudPanel

CloudPanel – Installing

Downloading CloudPanel

You can download the latest CloudPanel here.

Extracting Files

When you download CloudPanel you should of received a zip file that contained the following files:

  • CloudPanelWeb.msi
  • Setup.exe
  • CloudPanel.sql

Creating the Database

You should first create the CloudPanel database in your SQL Server. Simply open Microsoft SQL Server Management Studio, Click File, Open, File and select the CloudPanel.sql file from where you extracted the ZIP file. Click on Execute and this should create the database, tables, and all the stored procedures.

Install CloudPanel

  • Run setup.exe
  • Click Next
  • Select the Site you want to install CloudPanel in (Default Web Site normally)
  • Select ASP.NET v4.0 from the Application Pool drop down list
  • Click Next and let it install then click Close
  • Once finished go to the directory and right click on the application folder (defaults to CloudPanel), click properties, security, and add “IIS_IUSRS” to have full control.

Launch the Website & Configure

It may be different depending on where you installed it but you should be able to launch the website by going to: http://localhost/CloudPanel

The first time you log in you should be taken to a settings page where you can fill out the information. Below is some examples:

Organization Settings

  • Base OU: OU=Hosting,DC=cloud,DC=local
    This is the distinguished name of your base OU where it will create the resellers and companies
  • Primary DC: DC1.cloud.local
    This is the primary DC that CloudPanel will communicate with for all commands.

Database Settings

  • Connection String: Server=SQLSERVER\INSTANCE;Database=CloudPanel;User Id=USERNAME;Password=PASSWORD;
    This is the SQL connection string that CloudPanel uses to connect to its database

Exchange Settings

  • Exchange Server: mail.domain.com
    This is your Exchange 2010/2013 server. CloudPanel uses SSL to connect so you must have a certificate that your webserver trusts and it must match the name of your certificate.

Lync Settings

Currently CloudPanel uses the msRTC-GroupingID to configure Exchange. It will soon support the Hosting Pack for Lync. I would advise that you disable Lync and not use this section for now

Password Settings

  • Minimum Password Length: 8
    This will require a minimum length when creating users or resetting passwords. If you do not require a minimum length you can just put 0 (zero). Although I would strongly advise requiring this. At this time CloudPanel will not check that password complexity option in Active Directory
  • Domain Admin User/Pwd: DOMAIN\Administrator
    You must provide a username and password of a Domain Admin user that has rights to Active Directory and Exchange.

Super Admins

  • List of Super Admins: Domain Admins, Admins@COM
    You can provide a comma separate list of all security groups that you want to complete access to CloudPanel

Other

  • DEBUG Mode: False
    Setting this to true will generate a lot more logs that can be viewed from my Logs section. Enabling this is less security and makes the system run slower due to the amount of logs it will write to the database. Passwords will be viewed in Plain Text when this is enabled.

Once you click Validate and Save it will try to make sure your SQL connection, AD Structure, and credentials are valid.

Posted in CloudPanel

CloudPanel – Overview


Overview

CloudPanel is a web application that was developed to assist you in managing your hosted services. At the time of this writing it currently supports managing Exchange 2010 SP2 with Address Book Policies, Citrix XenApp, and structures your Active Directory more in a way it should be structured in a hosting environment.

Active Directory

CloudPanel was created to support Resellers. In Active Directory it structures organizational units as follow:

  • Hosting (Base OU)
    • Applications (Stores security groups for Citrix XenApp applications)
    • Reseller (Reseller OU)
      • CompanyCode (Companies that are created with CloudPanel)
        • Applications (Stores security groups for Citrix XenApp)
        • Exchange (Stores contacts and distribution groups for Exchange Server)

Citrix XenApp

CloudPanel does not manage or integrate with Citrix XenApp at all. Basically is controls adding users to security groups and removing them. You must add the Application@Hosting security group to the virtual application/server you want to have access to.

Example:

If you create a virtual application with the name “QuickBooks Pro 2013” in CloudPanel, it will create a security group named “QuickBooksPro2013@Hosting” and place it in the Applications OU located under the Base OU (OU=Applications,OU=Hosting,DC=domain,DC=local).

If you add a user to the “QuickBooks Pro 2013” virtual application in CloudPanel, it will create a security group named “QuickBooksPro2013@COMPANYCODE” and place it in the customers Application OU located under the Customers OU (OU=Applications,OU=Customer,OU=Reseller,OU=Hosting,DC=domain,DC=local). It will then add the “QuickBooksPro2013@COMPANYCODE” security group as a member of the main hosting security group “QuickBooksPro2013@Hosting”. This way in Citrix AppCenter you can add just the “QuickBooksPro2013@Hosting” security group as the list of allowed users and it will inherit down.

CloudPanel also has the capability of creating virtual servers / applications so only a specific customer can see them. You can just simply select the customer from the drop down list when adding.

Exchange Server

CloudPanel takes advantage of the Address Book Policies that were introducted into Exchange 2010 SP2. It has not been fully tested on Exchange 2013 but it should work. When you enable a company for Exchange it will automatically connect to your Exchange server and create the Address Lists, Global Address List, Offline Address Book, and Address Book Policies for you.

You can then go in and enable users for Exchange Server

Posted in CloudPanel

Find out who has received Quota limit notifications from Exchange

Get-TransportServer | Get-MessageTrackingLog -ResultSize Unlimited -Start "08/08/2012" -MessageSubject "your mailbox is" –EventID DELIVER | Select TimeStamp,Recipients,MessageSubject
Posted in Exchange Powershell

Exchange Event 9667

During the migration to Exchange 2010 you might have the need to keep your Exchange 2003 server up and running. This is a supported configuration but sometimes you can run into problems even though everything is technically configured correctly.

In our case our send connectors and routing group connectors were perfectly fine. Yet people on Exchange 2010 couldn’t email Exchange 2003 users via Outlook. Now the stranger thing was they could using OWA.

Well the problem had to do with Event ID: 9667:

Event ID: 9667
Type: Error
Category: General
Source: msgidNamedPropsQuotaError

Description: Failed to create a new named property for database “” because the number of named properties reached the quota limit (). User attempting to create the named property: . Named property GUID: . Named property name/id: .


So to fix the problem we had to follow these steps:

  • HKEY_LOCAL_MACHINE\SYSTEM\CurrentControlSet\Services\MSExchangeIS\\Private-*************
  • Modify the following registry vaule: NonMAPI Named Props Quota
  • Change the value from 8192 to 16384
  • Dismount and remount the store


Posted in Exchange 2003